How to stream your record player throughout your home (for cheap)
Note: this solution is geared towards folks with a bit of programming experience. It was inspired by/built on top of of a few great projects that are already out there. I’m not going to get into the nitty gritty of how to configure everything on this page. If you don’t know how to code, but are tech-oriented and feeling adventurous, you should be able to follow along.
Also — check out more of my builds on YouTube!
First — my goals.
Here’s what I was hoping to accomplish before I even started thinking about technical requirements:
1. I want to select a record from my collection, put it on my record player, and hear the music come from a Google Home/Chromecast Audio enabled device.
2. I want to be able to stream this music to multiple speakers at once. I would like the speakers to be synced. (Neither of these was critical)
3. I want to minimize time/effort spent between deciding to listen to music and hearing sound.
4. I want my wife to be able to do the same. (She’s understandably not interested in learning how IP addresses work).
5. I want to spend as little money as possible, < $80 if possible.
Spoilers: How’d I do?
1. It totally works, and it sounds great. The only caveat is that there is a considerable time delay between dropping the needle and hearing the tunes. Mine’s on the order of 10 seconds. This is not an issue when listening to a vinyl record (for me, at least). I’m not interacting with it enough to care or notice. This might be a deal breaker if you were hoping to broadcast a “live” source. You’re not going to have much luck streaming DJ sets or musical instruments.
2. I honestly didn’t know how feasible this was going to be, but I got syncing to work with no extra effort. Thanks, Google.
3. Neglecting the time it takes to physically place a record, my solution is as quick/easy to use as any other streaming app. You just fire up the turntable, open the app, and select your cast-enabled device/group. You can control the volume, and even… kind of… pause the stream from your phone once it’s connected. I didn’t experiment with this much, but it seems to work much like the “pause live TV” features on modern cable boxes.
4. This one’s still a work in progress. I have only prototyped an Android application, but my wife has an iPhone. It would be trivial to port this to iOS, though I’d love to avoid dealing with the App Store. I could just leave an old Android device laying around to use as a remote, but that’s just another device to have to keep charged. I’m more likely to build a Chrome app for her to access from her computer. More on that later.
5. I’m pretty stoked about how little I had to spend for this build. I spent ~$40 to get this up and running. I think you could even shave a few bucks off of that if you tried. This does not include the cost of the record player, speakers, and cast enabled devices.
What did I use?
- A Raspberry Pi. Any model will work, but keep in mind that you will need internet access. I used a Zero W, available on Adafruit for $10
- An Alsa-capable, stereo, USB analog to digital converter. In other words, a sound card with two inputs that works with Linux. I was surprised by how few small/cheap options were available, but this Behringer device is a bargain at $30.
- Cast-enabled speakers. There are a number of third-party options available. Google Homes are great, and the minis are regularly on sale for ~$25. I’m guessing that’s your cheapest option, though I can’t say they sound amazing. If you already have a stereo setup, you can simply connect a Chromecast Audio, which I’ve seen for as little as $15!
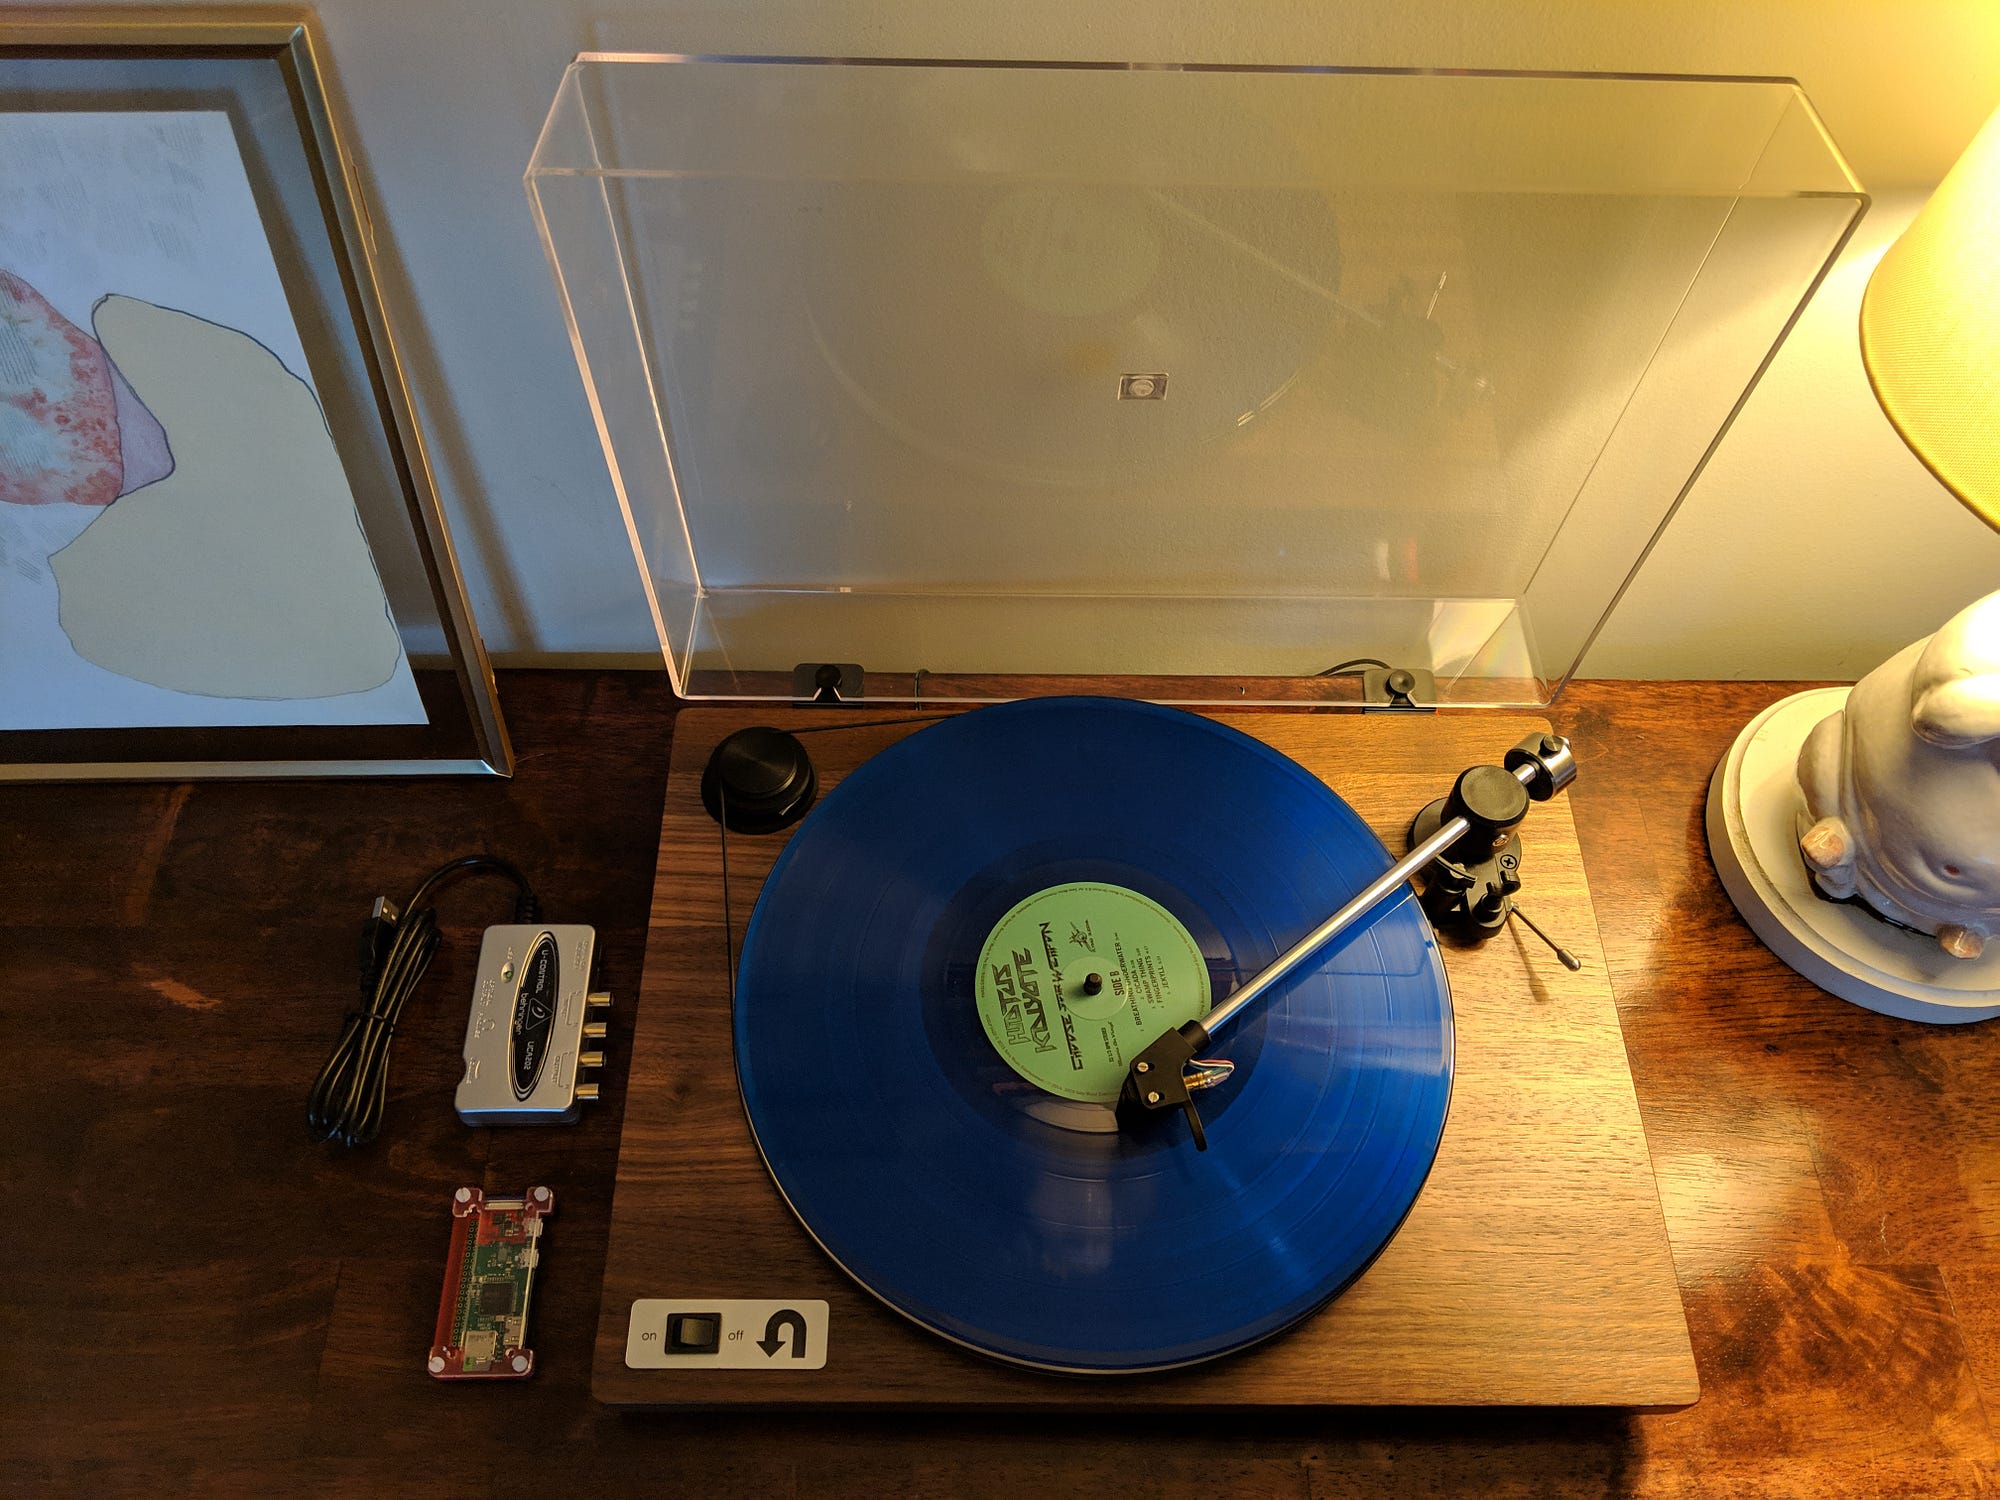
- A sound-producing source that you want to stream! I’m using a U-Turn Orbit turntable (which I love). Note that the sound card you get might only accept line-level input, so make sure you use a preamp if you’re hooking up a record player. The one I linked above has a phono preamp built in, so you won’t need it.
How does it work?
First — it’s important to know how Chromecasts/Cast-enabled devices play media. A “sender app”, running on an Android device, an iOS device, or inside Chrome, scans for Cast-enabled devices on your local WiFi network. When you click the “Cast” button in your sender app, you’ll see these devices listed by the names you provided when you set them up.

Select a device/group from this list, and the sender app will instruct them to load a specific “receiver app”. These are essentially just web applications used to fetch and present media on your screen or speakers. They run on the cast device itself. The critical thing to note here is that there is no media streaming directly between your sender app and the receiver app. The sender is simply responsible for pointing the receiver towards the targeted media, and then forwarding control commands (think Play, Pause, Volume Up, etc) input by the user.
At first glance, it looks like we need to build 3 components: A sender app, a receiver app, and a backend application to actually serve up the media to the receiver. Fortunately, Google provides a Default Media Receiver, which is able to play a number of standard audio/video file types. We’ll make sure that he audio stream we produce is compatible, so we really only have to worry about building 2 pieces: the sender app and the media server (in our case, an audio stream from the record player that’s readable from the Default Media Receiver).
Allen Schober, creator of the Vinyl Cast project, managed to do kill both birds with one stone. His Android application kills a bunch of figurative birds, actually. It performs all of the following functions:
- Reads raw audio from Analog-Digital converter
- Encodes audio into compressed stream format
- Acts as HTTP server and hosts audio stream on the user’s local network
- Provides UI to connect and control Cast-enabled devices (see the description of a “sender app” above)
- Leverages the Gracenote API to recognize the audio that’s playing in real time and display meta-data to the user
This project brilliantly illustrates just how powerful and flexible the Android platform can be, and I’d be lying if I said that it didn’t largely inspire my work here. However, I wanted to strip things down a bit. My wife and I didn’t love the idea of leaving an Android device tethered to the record player. We decided that we didn’t need to see the meta-data, and so there was really no reason to have a screen set up. Plus, I’d rather have access to the sender app on my personal device, which I (sadly) have by my side at all times. So the only thing I needed to figure out was how to convert and stream the audio, which was fortunately very easy to do using a Raspberry Pi and some open source tools. Here’s the breakdown:
Darkice runs on the Raspberry Pi. It reads the audio from the ADC and converts it into a stream.
Icecast also runs on the Raspberry Pi. It receives the stream from Darkice and serves it up via HTTP to your local network. In other words, it turns your Raspberry Pi into an internet radio station.
My barebones sender app runs on an Android device. It connects to cast-enabled devices and points them at the Icecast server.
The process of getting Darkice/Icecast up and running is explained very well in this post. I’m not going to reiterate here. I will point out, however, that this process can (and should!) be completed and tested without even thinking about a Chromecast or sender app. When you’re finished configuring the Pi, you can listen to your stream directly from a web browser using the URL you’ll have put together by the end of that tutorial. In fact, this simplified rig might be sufficient for some. If all you need to do is beam your audio source to a set of speakers in a different part of the house, you could just open the stream in your phone’s web browser and plug it into the stereo. Note that, unlike Chromecast groups, web browsers will not necessarily synchronize your stream’s audio, even if you start multiple instances at the same time.
The source code for my Android sender app, as well as a build you can install directly, is located here. It’s purposely very barebones — I generally try to only include code that is absolutely necessary to make the project as approachable as possible. The only thing you should need to change is the address of your Raspberry Pi on the local network. You have a few options here:
If you don’t want to change any source code, you can simply type the URL of your radio station directly into the text field within the android app before you hit the cast button. To avoid having to repeatedly check the IP address of your Pi, you can either make it static, or use your Pi’s hostname. If you’re “efficient” (lazy) like me, you can just hardcode your Pi’s IP address into the Android source code directly.
I’m curious to hear how this setup works for you, or if you have any useful tweaks. Please reach out here (is that possible?… This is my first Medium post) or via GitHub with questions or comments! I also occasionally post projects on my Instagram account.
